Guide
Step by step, with screenshots
Everything you'll see, from start to finish. You can read it before buying: if something doesn't suit you, better to know now. Allow a quiet afternoon; you only answer a few questions at the start.
1. Before you start
Check your Mac
Apple menu → About This Mac. It shows the model and year, for example “MacBook Air (13-inch, Early 2015)” and “Processor … Intel”. The kit covers MacBook, MacBook Air, MacBook Pro, iMac and Mac mini from 2012 to 2015, and the 2017 MacBook Pro without Touch Bar. If you're unsure, use the checker on the website: the wizard also checks it for free before asking you for anything.
What you need
- A USB stick of 8 GB or more. It gets completely erased. The 2017 MacBook Pro only has USB-C: a USB-C stick or an adapter.
- Internet: the wizard downloads about 5 GB. With a slow connection, you can download the file on another computer (the wizard tells you which one).
- For macOS to stay, about 25 GB free. If there isn't that much, the wizard can make room by shrinking macOS, without deleting anything of yours.
- The macOS administrator password (the one you use to install apps).
- Your purchase code (RTM-XXXX-XXXX), which comes by email. If you've lost it, we'll send it again.
- The charger plugged in, if it's a laptop.
Make a backup
If Linux goes in next to macOS, your files aren't touched. Even so, any change to the disk carries some risk, so copy what matters first. The easiest way is Time Machine:
- Plug in an external disk with plenty of space.
- System Preferences (System Settings on newer macOS) → Time Machine → “Select Disk…” and choose the external disk.
- Wait for the first backup to finish (the first one takes hours; you can keep using the Mac).
Without an external disk, copy at least your documents and photos to a USB stick or the cloud. If your photos are in iCloud, they're already safe there.
2. Prepare the USB stick with the wizard
On the Mac you want to bring back, download the ResucitaTuMac wizard. It arrives as ResucitaTuMac.zip in Downloads: double-click it and open the app that appears. macOS asks whether you want to open an app downloaded from the internet: click Open. It's signed and checked by Apple.
The wizard is a single window with the steps on the left. It changes nothing on the disk or the USB stick until the very end, and you can always go back.
Welcome
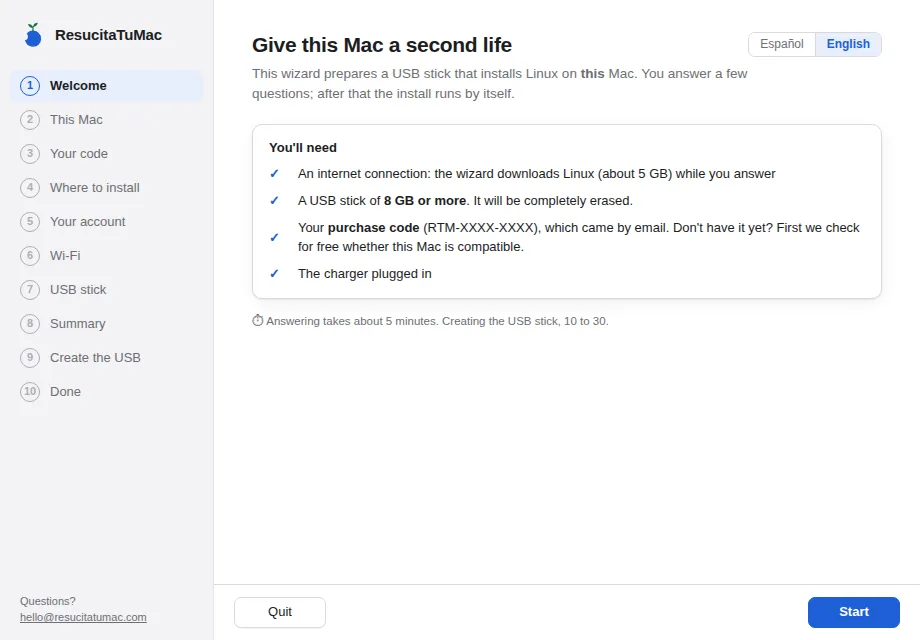
Go over what you'll need and click “Start”. At the top right you choose the language, English or Spanish: it's the wizard's and also the installed system's.
This Mac
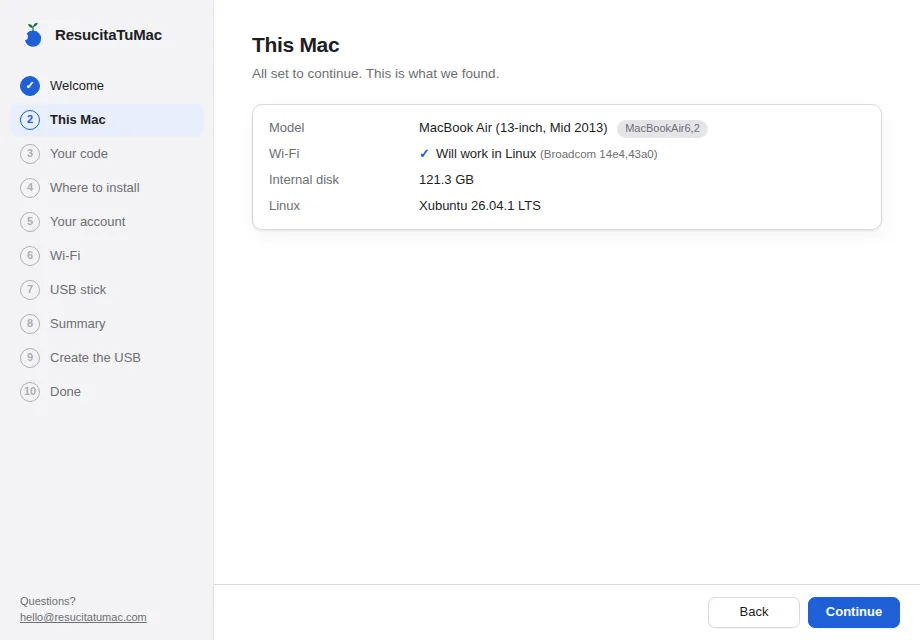
The wizard reads the model, the Wi-Fi chip and the disk. If this Mac isn't compatible, it tells you here and does nothing else.
Your code
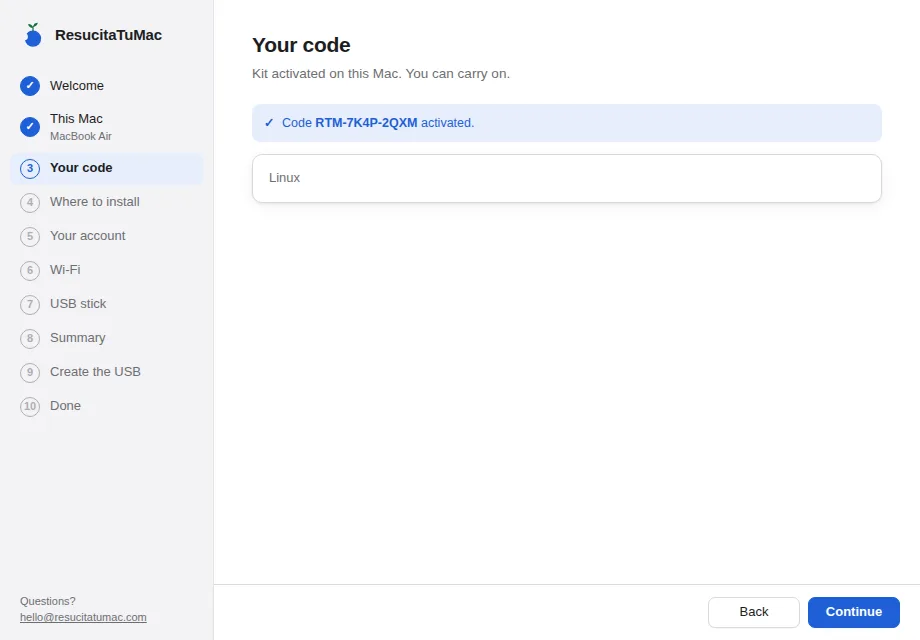
Type your purchase code. Capitals, lower case or dashes don't matter. When you activate it, the wizard downloads the kit's drivers and starts downloading Xubuntu from its official website while you answer the rest. On the same Mac you can use the code as many times as you like; it works on 2 different Macs.
Where to install
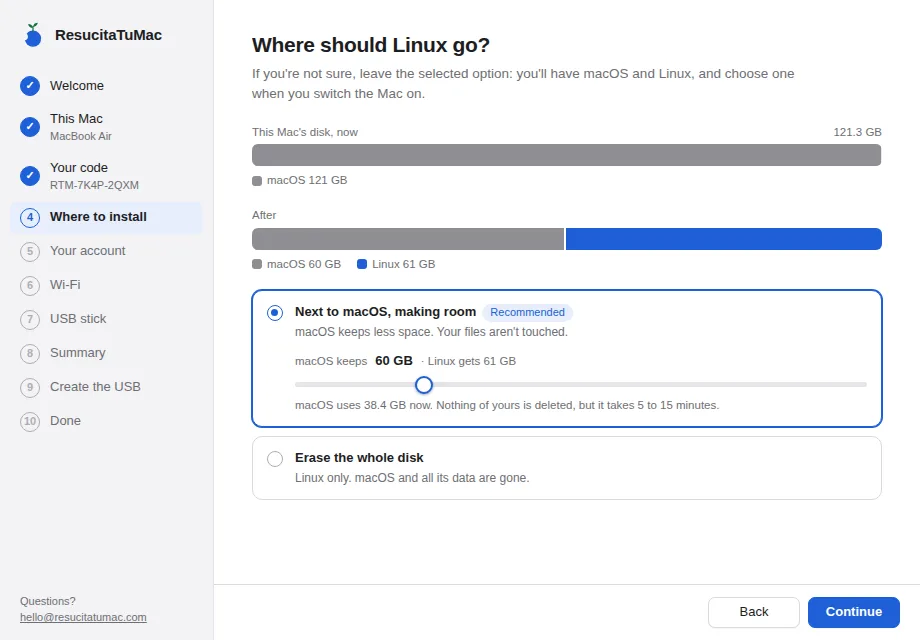
The bar at the top shows the disk now and how it will end up. The options:
- Next to macOS, making room (recommended if you have no free space): macOS keeps less space and Linux uses the rest. Move the slider to split it. macOS always keeps what it uses plus 15 GB.
- Next to macOS, in the free space: if you already have unused space on the disk.
- In place of another partition: for example, a Boot Camp Windows you no longer use, or an earlier Linux.
- Erase the whole disk: Linux only, macOS disappears with all its data. You have to type ERASE to choose it.
Not sure how much to give Linux? 40–60 GB is plenty for normal use (more on the split).
Your account
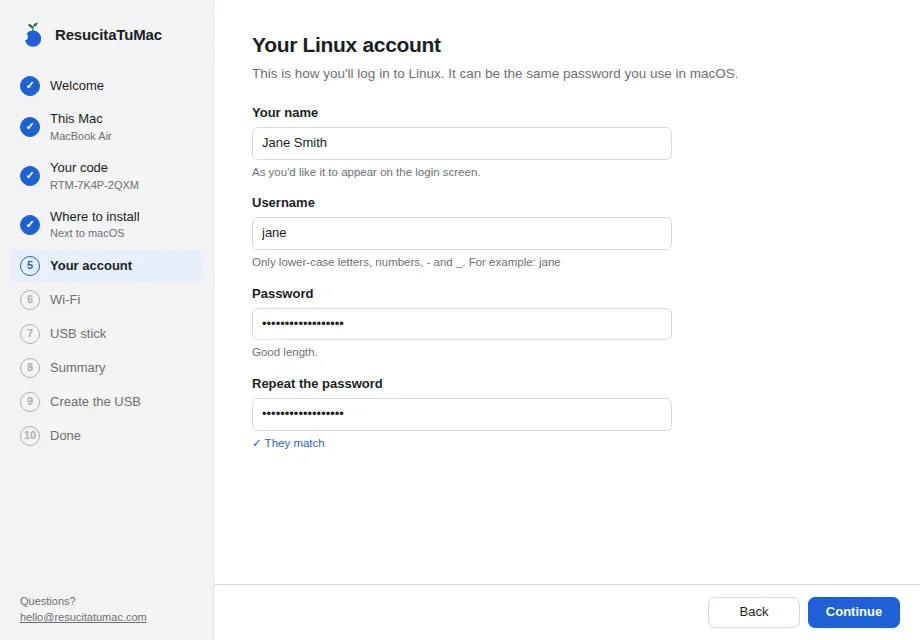
Your name, the username to log in with and a password. They come filled in from macOS; you can use the same password as in macOS. Note it down: it's asked for when you log in and when you install apps.
Wi-Fi
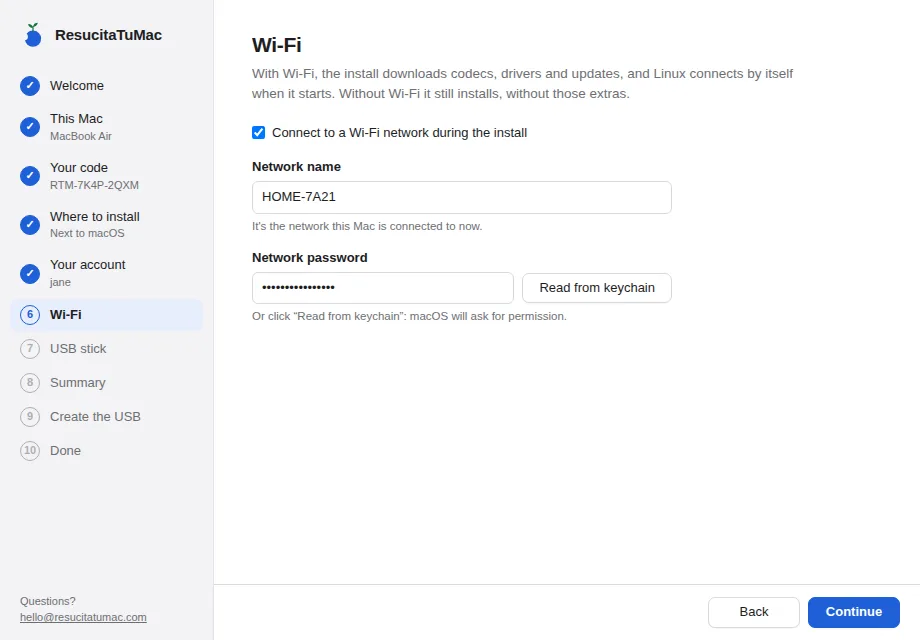
With Wi-Fi, the install downloads codecs and updates, and Linux starts already connected. Your network's name is filled in; the password can be read from the macOS keychain with “Read from keychain” (macOS will ask for permission).
USB
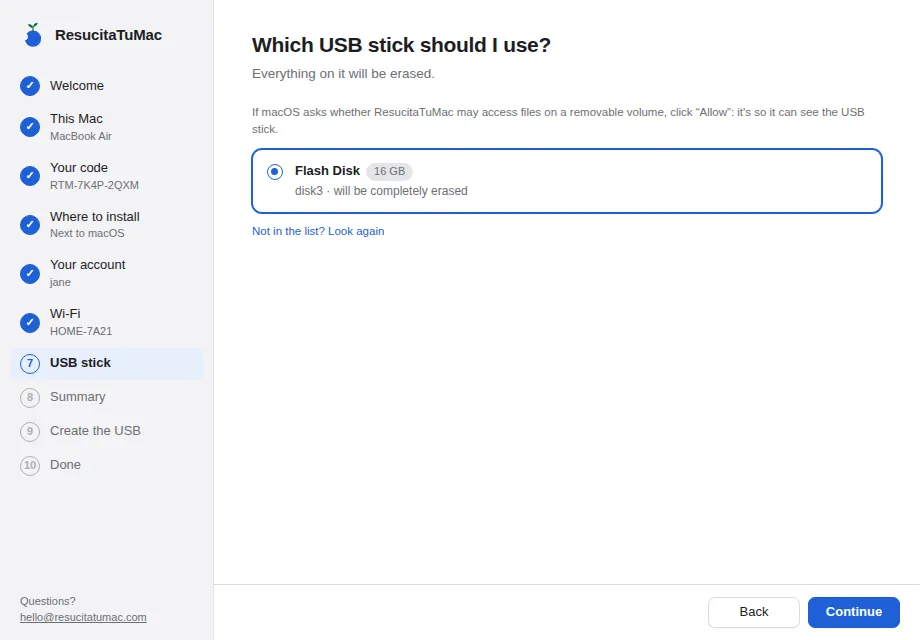
Plug in the USB stick and choose it. It will be completely erased. If macOS asks whether ResucitaTuMac may access a removable volume, click “Allow”.
Summary
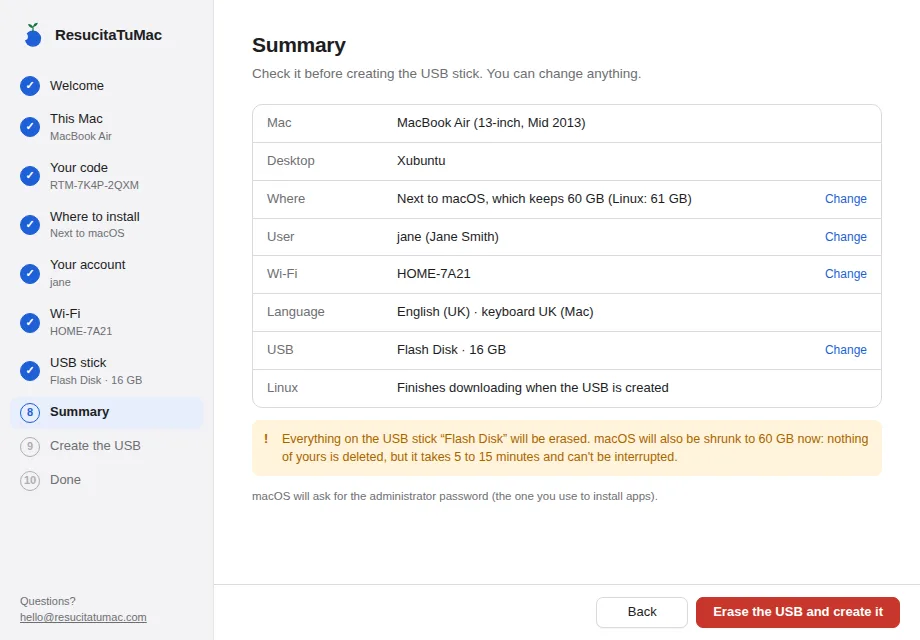
Check everything. “Change” takes you to the step. The “Language” row says which language and keyboard Linux is installed with: the keyboard is the one you use in macOS. The red button erases the USB stick (and, if you chose it, shrinks macOS right then) and starts. macOS will ask for the administrator password.
Create the USB stick
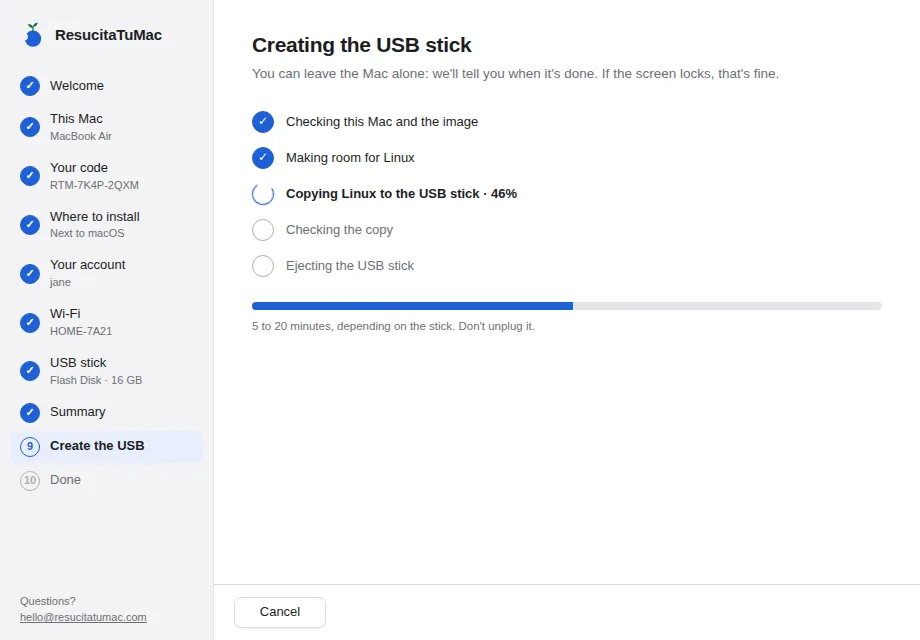
10 to 30 minutes. You can leave the Mac alone; if the screen locks, that's fine. While macOS is being resized it can't be cancelled (so as not to damage the disk); during the copy it can.
Done
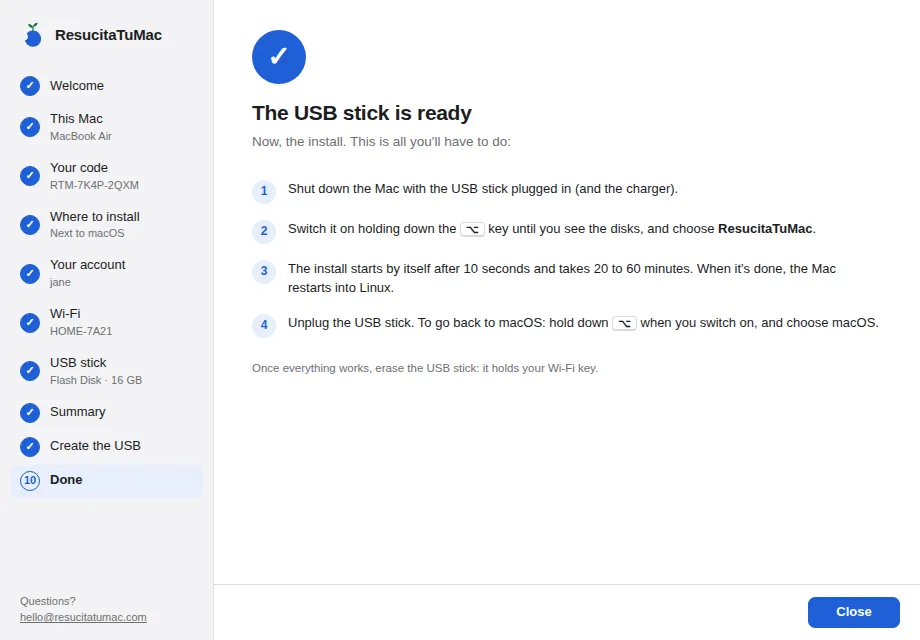
3. Install: start from the USB stick
- With the USB stick and the charger plugged in, shut down the Mac (Apple menu → Shut Down).
- Press the power button and, right after, hold down the ⌥ key (alt/option). Let go when you see the disks on screen, on a grey background.
- Choose ResucitaTuMac (the USB stick's icon) with the arrow keys or the trackpad and press Return.
- A menu appears; don't touch anything: after 10 seconds the automatic install starts. You'll see the Xubuntu desktop with the installer's window moving along by itself.
- It takes 20 to 60 minutes. Don't switch the Mac off, even if it seems stuck for a good while: at the end it installs security updates without saying anything.
- When it's done it restarts by itself and the Xubuntu login screen appears. Unplug the USB stick and log in with your username and password.
From now on, the Mac starts Xubuntu. To go to macOS: hold ⌥ when you switch on and choose your macOS disk. In that menu, Linux shows up as “Xubuntu”.
4. Your first day with Xubuntu
- It's already set up: in the language you chose, with your Mac's keyboard, your Wi-Fi, your time zone and a desktop that handles like a Mac: apps along the bottom, window buttons on the left, the usual ⌘C / ⌘V / ⌘Q.
- Apps: Firefox, LibreOffice (opens Word, Excel and PowerPoint), email and more come with it. The rest install for free from the App Center. The list of equivalents tells you which to use for what.
- Updates: the system tells you when there are some; accept them. They're free and come until April 2029, and before then it offers to move you to the next version.
- The camera turns on by itself the first time the Mac is online (it downloads its firmware from Apple). If it doesn't work straight away, restart once.
- Video: YouTube and the streaming services work well up to Full HD. 4K doesn't: these Macs' graphics chip can't decode it.
- Your macOS and iCloud files stay in macOS. From Linux, iCloud is used at icloud.com in the browser.
- Language: to change it later, Settings → Language Support.
How do I…
- Install Google Chrome: at google.com/chrome download the “.deb (for Debian/Ubuntu)” package, double-click it in Downloads and type your password. After that it updates by itself.
- Install other apps: open the App Center, search for it and click “Install”.
- Print: connect the printer by USB or to the same Wi-Fi; most show up by themselves when you print. If not: applications menu → Settings → Printers → Add.
- Scan: with the Document Scanner app.
- External display: connect it with the same adapter you used in macOS; it turns on by itself, and you adjust it in Settings → Display. On 15-inch MacBook Pros with two graphics chips, first follow the warning the wizard gives you.
- Where downloads go: in the Downloads folder, inside Files (Linux's Finder).
- Take a screenshot: Mac keyboards have no Print Screen key, so use the Screenshot app in the menu.
- Copy and paste: ⌘C and ⌘V, as in macOS. In the Terminal, Ctrl.
- USB sticks and disks: they show up in Files; eject them before unplugging. Linux doesn't read disks formatted for Mac (APFS), like the Time Machine one: to move files between the two systems use a USB stick formatted as exFAT, or the cloud.
5. If something doesn't work
The most common things, and what to do. If it isn't here, write to us at support@resucitatumac.com or on WhatsApp with your code and what you see (a photo with your phone helps a lot).
| What happens | What to do |
|---|---|
| Holding ⌥, “ResucitaTuMac” doesn't appear | Hold ⌥ from before the startup chime. Try the USB stick in the other USB port. With an external keyboard, use the Mac's own instead. |
| “macOS couldn't be shrunk… locked volumes” | It usually happens on second-hand Macs: an encrypted volume from the previous owner is left behind. macOS is untouched. Write to us and we'll tell you how to remove it. |
| The Linux download is very slow or fails | Try again (it carries on where it stopped), or under “This Mac” click “Slow internet?” to use a file downloaded on another computer. |
| The install seems stuck | Wait. At the end it installs updates without showing progress, sometimes for over half an hour. Don't switch the Mac off. |
| The install stops and “INSTALL-STOPPED.txt” opens | If it says the USB stick was prepared for another Mac or that there's no space, nothing has been touched: switch off and go back to macOS. If it's another error, there's a folder rtm/registros-… on the USB stick: send it to us. |
| The Mac starts macOS instead of Xubuntu (or the other way round) | Hold ⌥ when you switch on and choose. To change the usual one: in macOS, System Preferences → Startup Disk. |
| No Wi-Fi in Xubuntu | Restart once. If it still doesn't show up, write to us with your Mac's model. |
| Keys type the wrong symbols (@, #, quotes…) | The keyboard is taken from the one you use in macOS. If it doesn't match yours: Settings → Keyboard → Layout. |
| The screen flickers or goes black (2013–2014 Macs) | Write to us: it's fixed with a boot setting we'll send you. |
6. Changing Linux's space
The split is chosen when installing, and it's worth getting right: 40–60 GB for Linux is plenty for normal use (documents, photos, browsing). If you'll keep a lot of music or video in Linux, give it more.
Changing it later means reinstalling Linux: save your Linux files to a USB stick or the cloud, remove Linux and install it again with the new split. Your code works for reinstalling on the same Mac as many times as needed, and your macOS files aren't touched.
7. Remove Linux and go back to how it was
- Save what you want from Linux. Start Xubuntu and copy your files to a USB stick or the cloud: macOS can't read the Linux disk.
- Start macOS (⌥ at power-on) and open the ResucitaTuMac wizard.
- Under “This Mac” you'll see it already has Linux. Click Remove Linux.
- If the Mac starts Linux when switched on, the wizard first guides you to make it start macOS: open “Startup Disk”, click the padlock, choose Macintosh HD and close the window. The wizard notices by itself.
- Type ERASE and confirm with your administrator password.
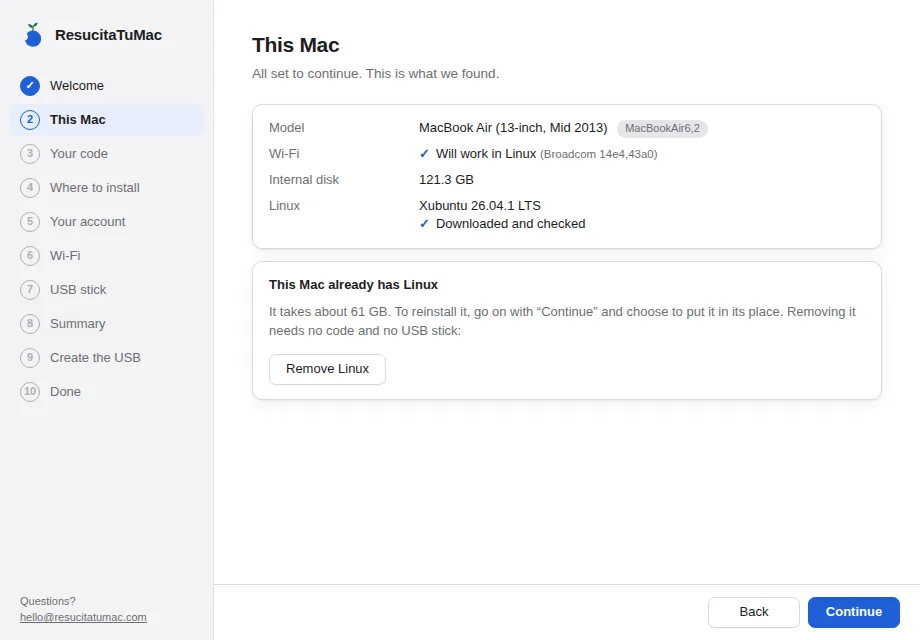
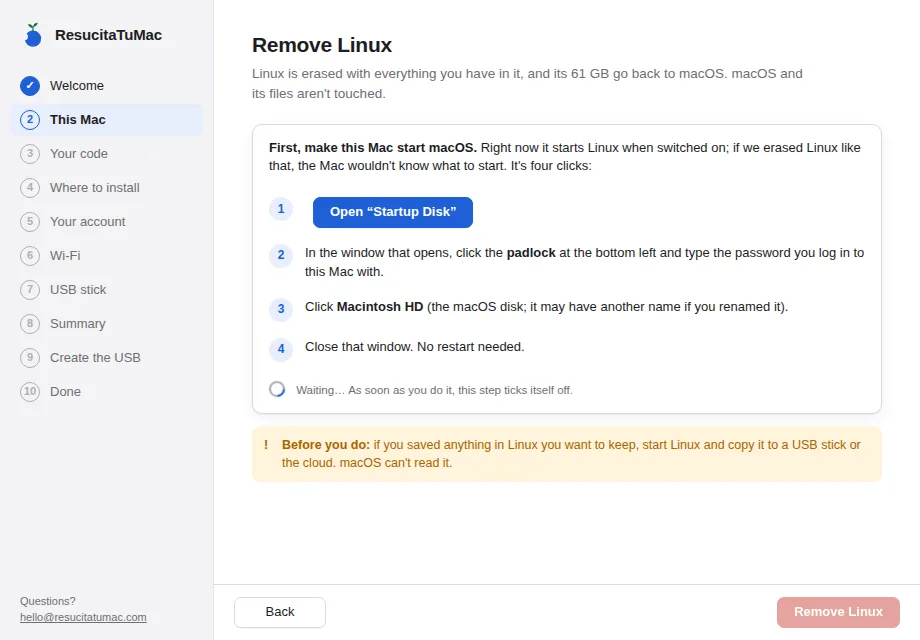
The wizard erases Linux, removes “Xubuntu” from the startup menu and gives the space back to macOS. The Mac starts macOS again as before. It takes a few minutes and needs no code and no restart. If you were removing it to install again from scratch, click Install Linux again and the wizard carries on from “This Mac”.
If you chose to erase the whole disk back then, there's no macOS to go back to: it's reinstalled from Apple's recovery (⌘⌥R at power-on, with internet) and then you restore your files from Time Machine.
8. Lost your code?
Type the email you paid with and we'll send it there again.